How to Spot and Address Waterproofing Roofing Defects Before They Escalate

In Australia, we are no strangers to wild weather. From tropical downpours in the north to the sudden, intense storms that can sweep across the southern states, our homes are constantly being tested. While we often think about the visible parts of our roof, there's an invisible shield that does much of the heavy lifting: waterproofing.

A roof's waterproofing system is the critical barrier that stops water from penetrating your home's structure. When it works, you barely notice it. But when it fails, the consequences can range from a minor inconvenience to a catastrophic structural issue. A small leak in the membrane or a poorly sealed join can quietly let moisture seep into your ceiling cavities, rotting timber and fostering mould.

Proactive maintenance of your roof's waterproofing isn't just good practice; it's essential for protecting your biggest asset from water damage. In this blog, we will explain the most common waterproofing defects found, how to identify them early, and clarify what steps to take. 


Why Waterproofing is a Roof's Most Critical Defence

Australia’s harsh sun is a major enemy of these systems. Constant UV exposure can cause waterproofing membranes to become brittle, crack, or lose their elasticity over time. Add to that the stress of torrential rain and rapid temperature changes, and you have a recipe for accelerated wear and tear. A small failure in this system can compromise your entire home.


Common Waterproofing Defects to Look For

You don’t need to be a professional roofer to spot the early warning signs of waterproofing failure. Knowing where and what to look for can help you catch problems before they become expensive disasters.


1. Cracking or Blistering Membranes

Liquid membranes are applied like a thick paint and dry to form a seamless waterproof layer. Over time, exposure and movement can cause them to fail.

  • What to look for: Look for visible cracks, bubbles, or areas where the membrane appears to be lifting or peeling away from the roof surface. Blisters often look like bumps or air pockets trapped underneath.
  • The risk: Any break in the membrane is a direct entry point for water. Blisters indicate a loss of adhesion, meaning water can get trapped between the membrane and the substrate, leading to widespread leaks.

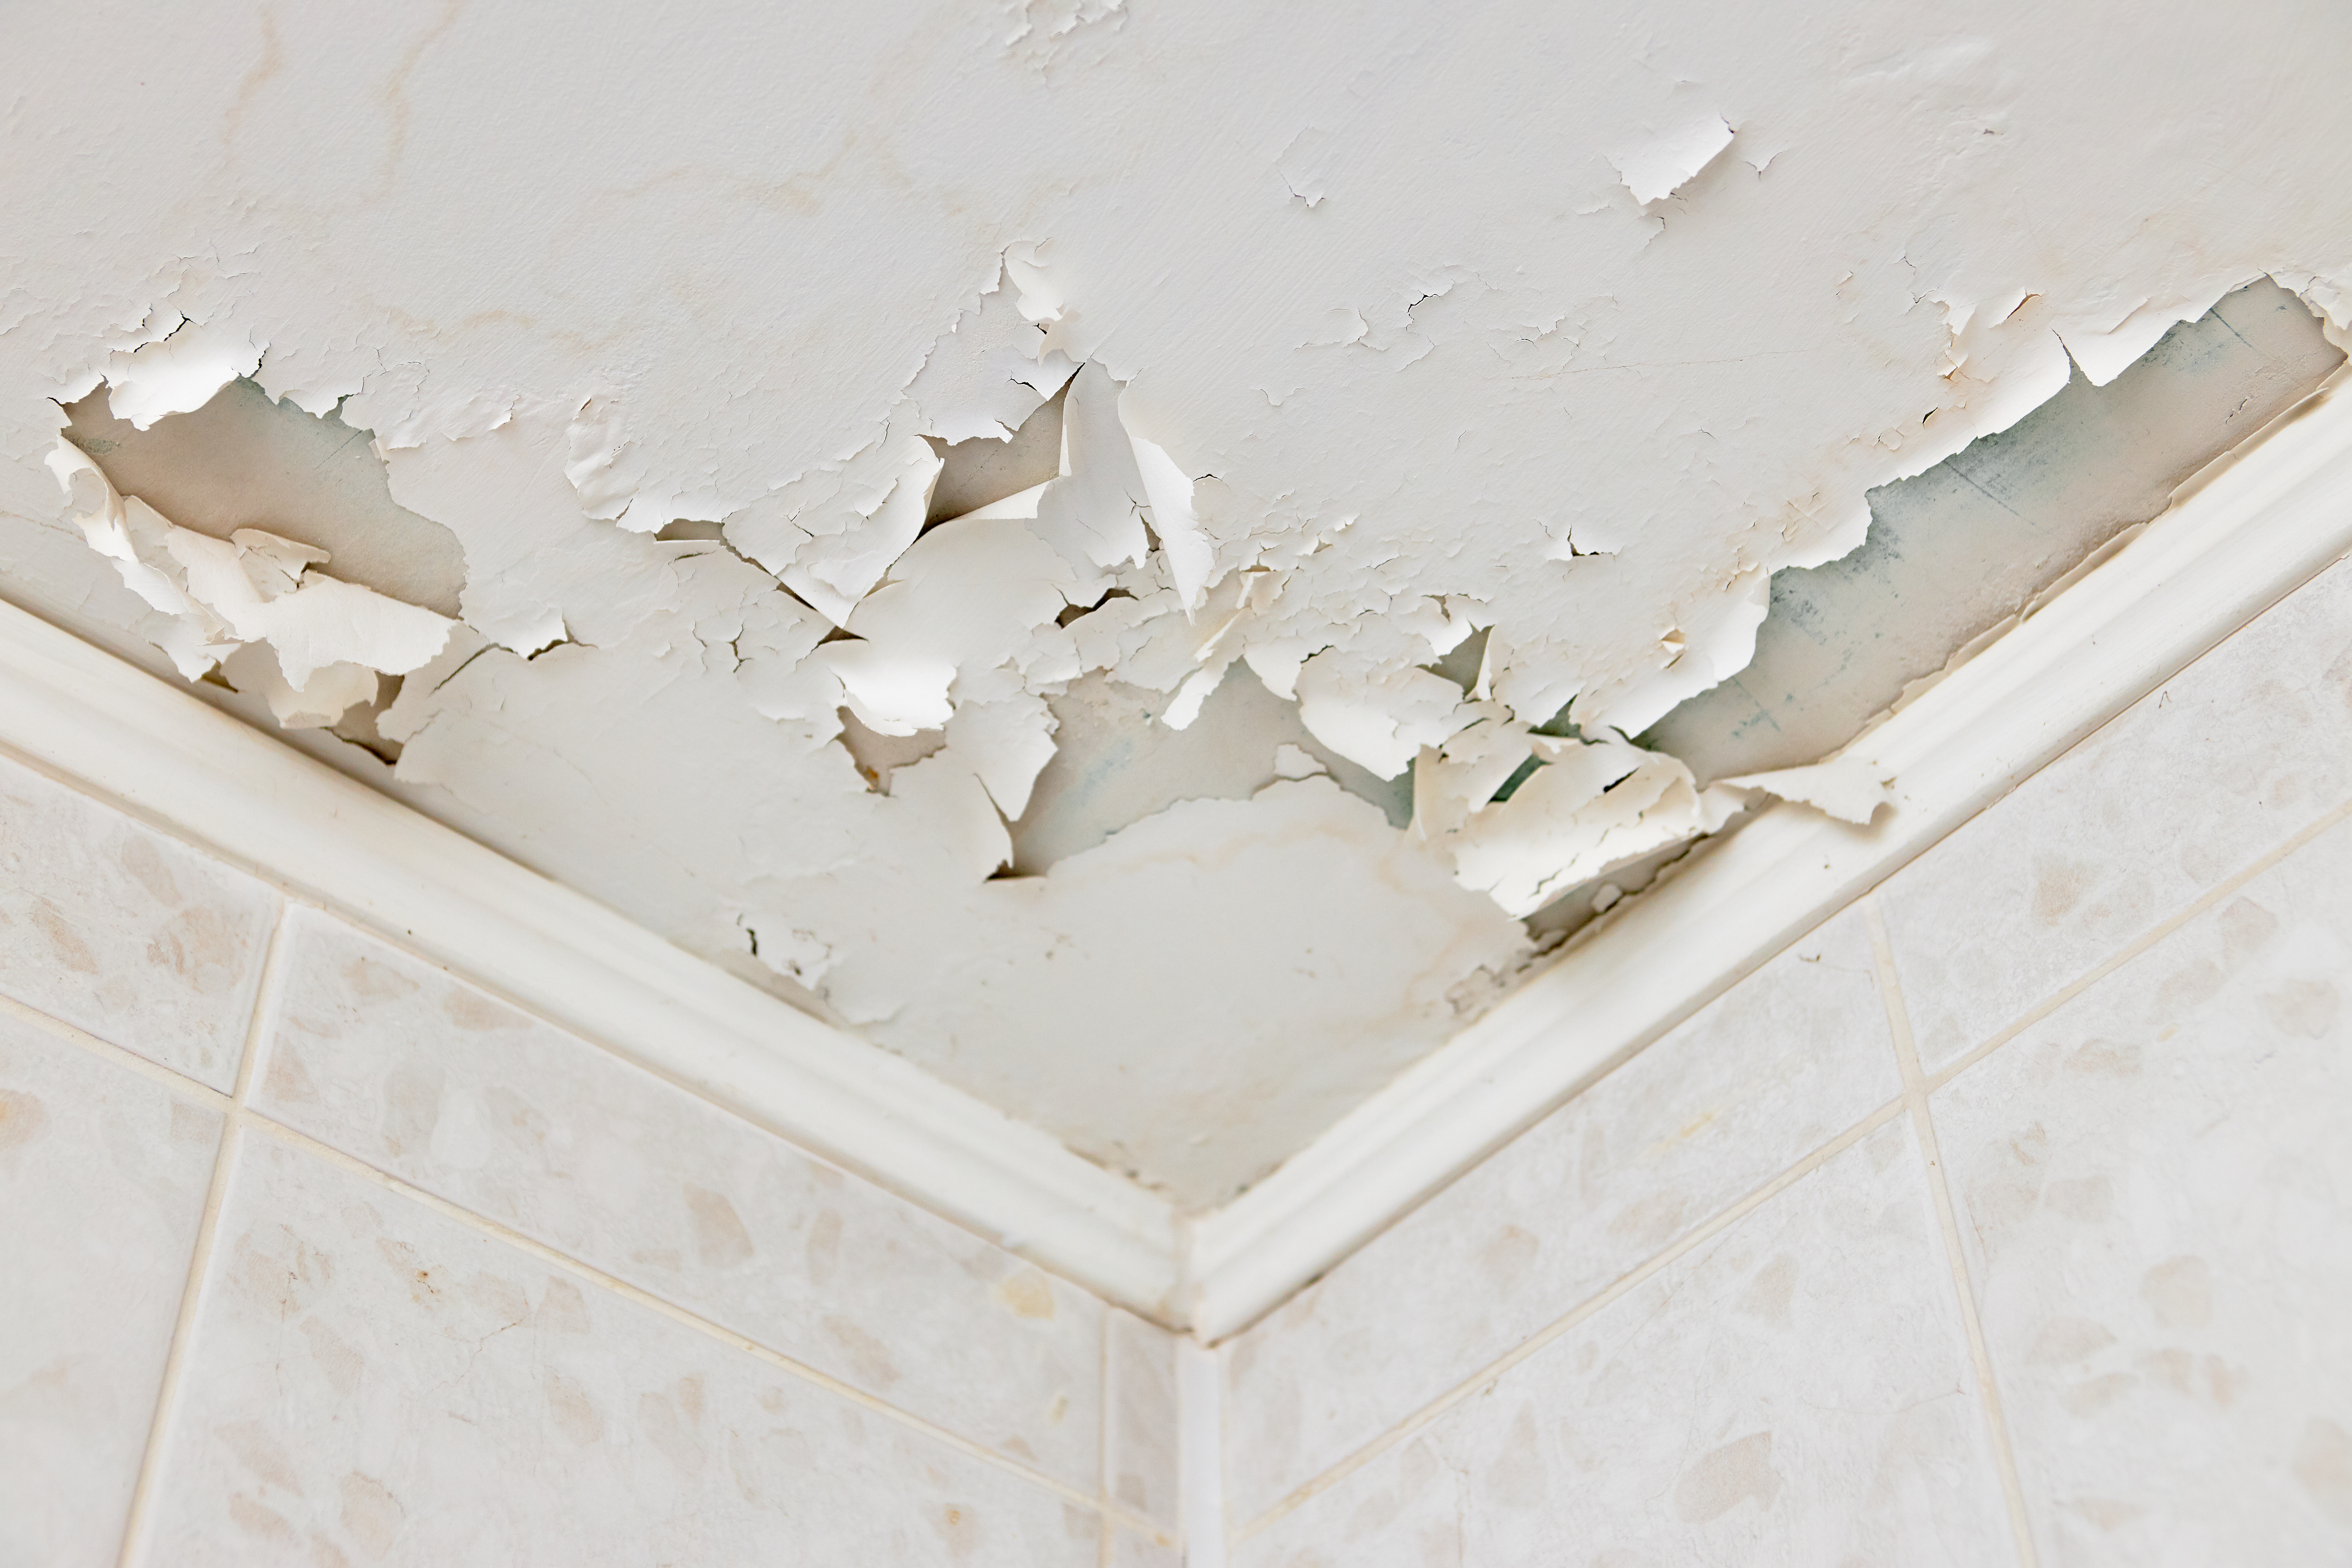
[Swelling of whitewash and plaster on the ceiling of the dwelling due to penetration of water]

2. Poor Drainage and Water Pooling

Water that sits on a roof for more than 48 hours after rain is a major red flag. This is known as "ponding" or "pooling."

  • What to look for: After a storm, check flat roof areas, box gutters, and balconies. If you see large, persistent puddles, it signals a drainage problem. This could be due to a blocked drain or an incorrect fall (slope) in the roof design.
  • The risk: Standing water adds immense weight, stressing the roof structure. It also accelerates the deterioration of waterproofing materials and provides a breeding ground for algae and moss, which can further damage surfaces.


3. Degraded Sealants and Failed Seams

Sealants (like silicone) are used to waterproof joints, flashing, and penetrations like pipes or vents. On sheet membranes, seams are welded or glued together. These are common failure points.

  • What to look for: Examine the sealant around vents, skylights, and along roof edges. Look for sealant that is cracked, shrinking, or pulling away. On sheet membranes, check if the seams are lifting or separating.
  • The risk: Failed seals are like leaving a window open in a storm. They create a direct path for water to get into the most vulnerable parts of your roof structure.


4. Blocked Drains and Scuppers

Drains, downpipes, and scuppers (outlets through a parapet wall) are designed to get water off your roof quickly.

  • What to look for: Leaves, dirt, and other debris can easily clog these outlets. Look for visible blockages or signs of water overflowing from gutters and drain entry points during rain.
  • The risk: A blocked drain forces water to back up and pool. This can lead to overflow into the eaves or wall cavities, causing significant internal water damage.

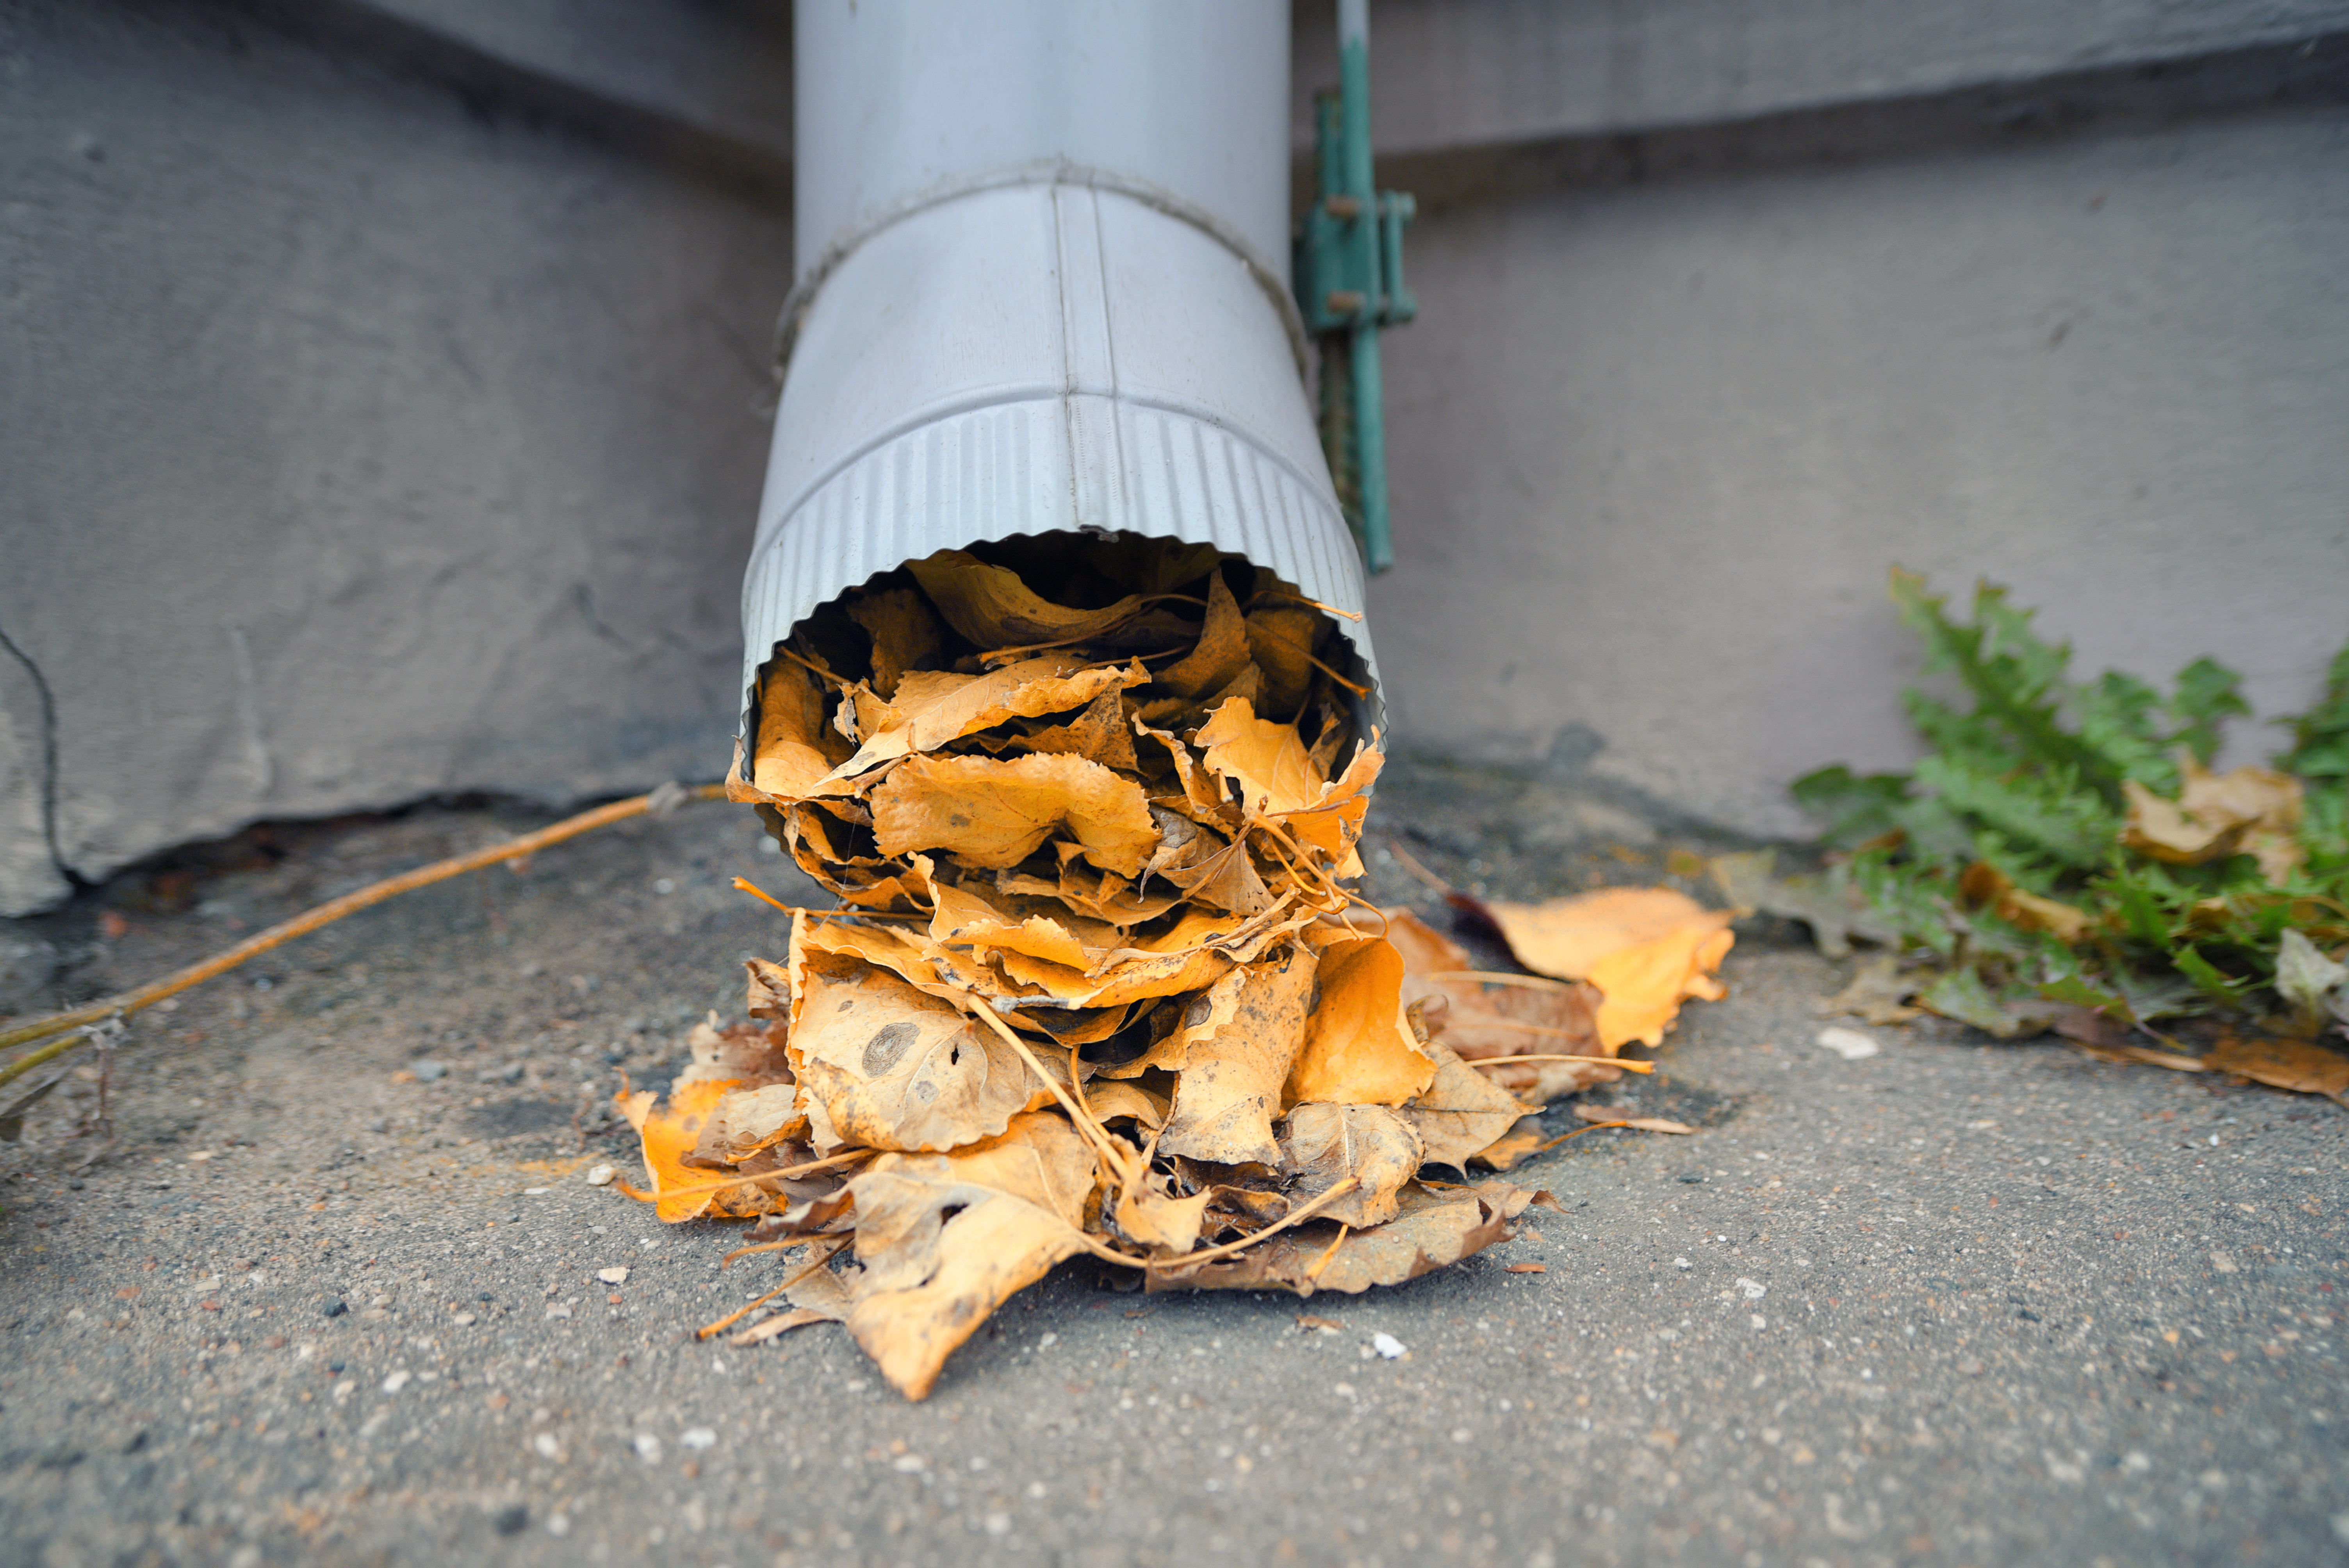
[Clogged downpipe with leaves]


5. Punctures or Physical Damage

Foot traffic from other trades (like air-conditioning installers or solar panel technicians), falling branches, or even hail can puncture a waterproofing membrane.

  • What to look for: Carefully inspect the surface for any holes, tears, or deep scratches. These may be small and hard to see, but they can cause major leaks.
  • The risk: A puncture completely negates the purpose of the membrane, allowing water direct access to the substrate below.


How to Conduct a Safe Waterproofing Inspection

Regular checks can save you thousands. Aim to inspect key waterproofing areas twice a year, ideally before and after storm season.


The Visual Interior Check

Your home's interior often shows the first signs of a problem.

  • Ceiling Stains: Look for yellow or brown rings on the ceiling. These are tell-tale signs of a slow, persistent leak.
  • Peeling Paint: Bubbling or peeling paint on ceilings or near the tops of walls indicates moisture getting in.
  • Musty Smells: A damp, earthy smell in certain rooms, especially after rain, points to hidden moisture and potential mould growth.


The Exterior Ground-Level Check

You can spot many issues from the ground with a pair of binoculars.

  • Check Overflows: Look at your gutter and box gutter overflow outlets. Are there stains on the wall below them? This shows the system is frequently overwhelmed.
  • Inspect Eaves: Scan the underside of your eaves for water stains or rotting timber.


The Up-Close Check (Use Extreme Caution)

If you have safe access to a flat roof or balcony, you can perform a closer inspection.

  • Safety is paramount: Only access these areas if the roof is dry, low-set, and you are confident with heights. Always have a spotter.
  • Clear Debris: Gently sweep away leaves and dirt from drains and corners to check the condition of the membrane and seals underneath.
  • Check for Sponginess: Gently press on the roof surface. If it feels soft or spongy, it could indicate that the underlying material is waterlogged and rotting.


Addressing the Defects: DIY vs. Professional Intervention

While the Aussie DIY spirit is strong, waterproofing is a specialised field where mistakes can be costly.


When to DIY

Minor, preventative maintenance is often suitable for a handy homeowner.

  • Clearing Drains and Gutters: Regularly removing leaves and debris from all roof outlets is the most effective DIY task you can do.
  • Trimming Overhanging Branches: This prevents punctures from falling limbs and reduces leaf litter.
  • Applying Sealant to a Minor Crack: For a very small, accessible crack in a sealant joint, applying a high-quality polyurethane sealant can be a temporary fix. However, this is often a sign of a larger issue.


When to Call a Professional

For almost all other waterproofing issues, a licensed professional is your best and safest option.

  • Repairing a Membrane: Fixing a blistered, cracked, or punctured membrane requires proper surface preparation and material compatibility knowledge to create a permanent seal.
  • Diagnosing Leaks: The source of a leak is rarely directly above the stain on your ceiling. Professionals have the tools and experience to trace water paths and find the true entry point.
  • Addressing Pooling Water: Correcting a drainage issue might involve re-screeding a roof to create the proper fall, a job that requires precision.
  • Complete Membrane Replacement: This is a major project that requires stripping the roof back, preparing the substrate, and applying a new system correctly. It's not a DIY job.


The High Cost of Ignoring Waterproofing Failures

Putting off a waterproofing repair is a surefire way to multiply your costs down the line.

  1. Concrete Cancer: On concrete roofs and balconies, water penetration can reach the internal steel reinforcement. This causes the steel to rust and expand, cracking the concrete from within - a condition known as "concrete cancer" that is incredibly expensive to remediate.
  1. Structural Rot: Persistent moisture will rot timber joists, beams, and roof decking, compromising the structural integrity of your home.
  1. Mould Infestation: Damp, dark ceiling cavities are a perfect breeding ground for toxic black mould, which can pose serious health risks to your family and require costly specialist removal.
  1. Denied Insurance Claims: Most insurance policies will not cover damage resulting from poor maintenance. If your roof fails because a known defect was ignored, your claim will likely be rejected. 

Your roof's waterproofing is its ultimate guardian against the Australian elements. Giving it the attention it deserves through regular inspections and swift action is one of the smartest investments you can make. By checking for pooling water, cracked membranes, and blocked drains, you can catch defects while they are still minor and manageable. 

Don’t wait for a ceiling stain to appear. Take the time to inspect your roof’s vulnerable areas this weekend. If you find something that doesn’t look right, or if it's simply been too long since the last check-up, engaging a qualified waterproofing professional will provide peace of mind and protect your home for years to come.


Share this article

LinkedIn   Facebook   Twitter

You might also be interested in:

Waterproofing Challenges in High-Rise Construction Waterproofing Waterproofing Challenges in High-Rise Construction

High-rise buildings dominate Australia's urban landscape, from Sydney's towering residential complexes...

The 7 Sins of Waterproofing (And How to Avoid Them) Waterproofing The 7 Sins of Waterproofing (And How to Avoid Them)

Waterproofing is one of the most critical stages of any new construction or remediation project. When done correctly, it’s an invisible guardian...