Building for Bloom: The Essential Guide to Structural Planter Installation
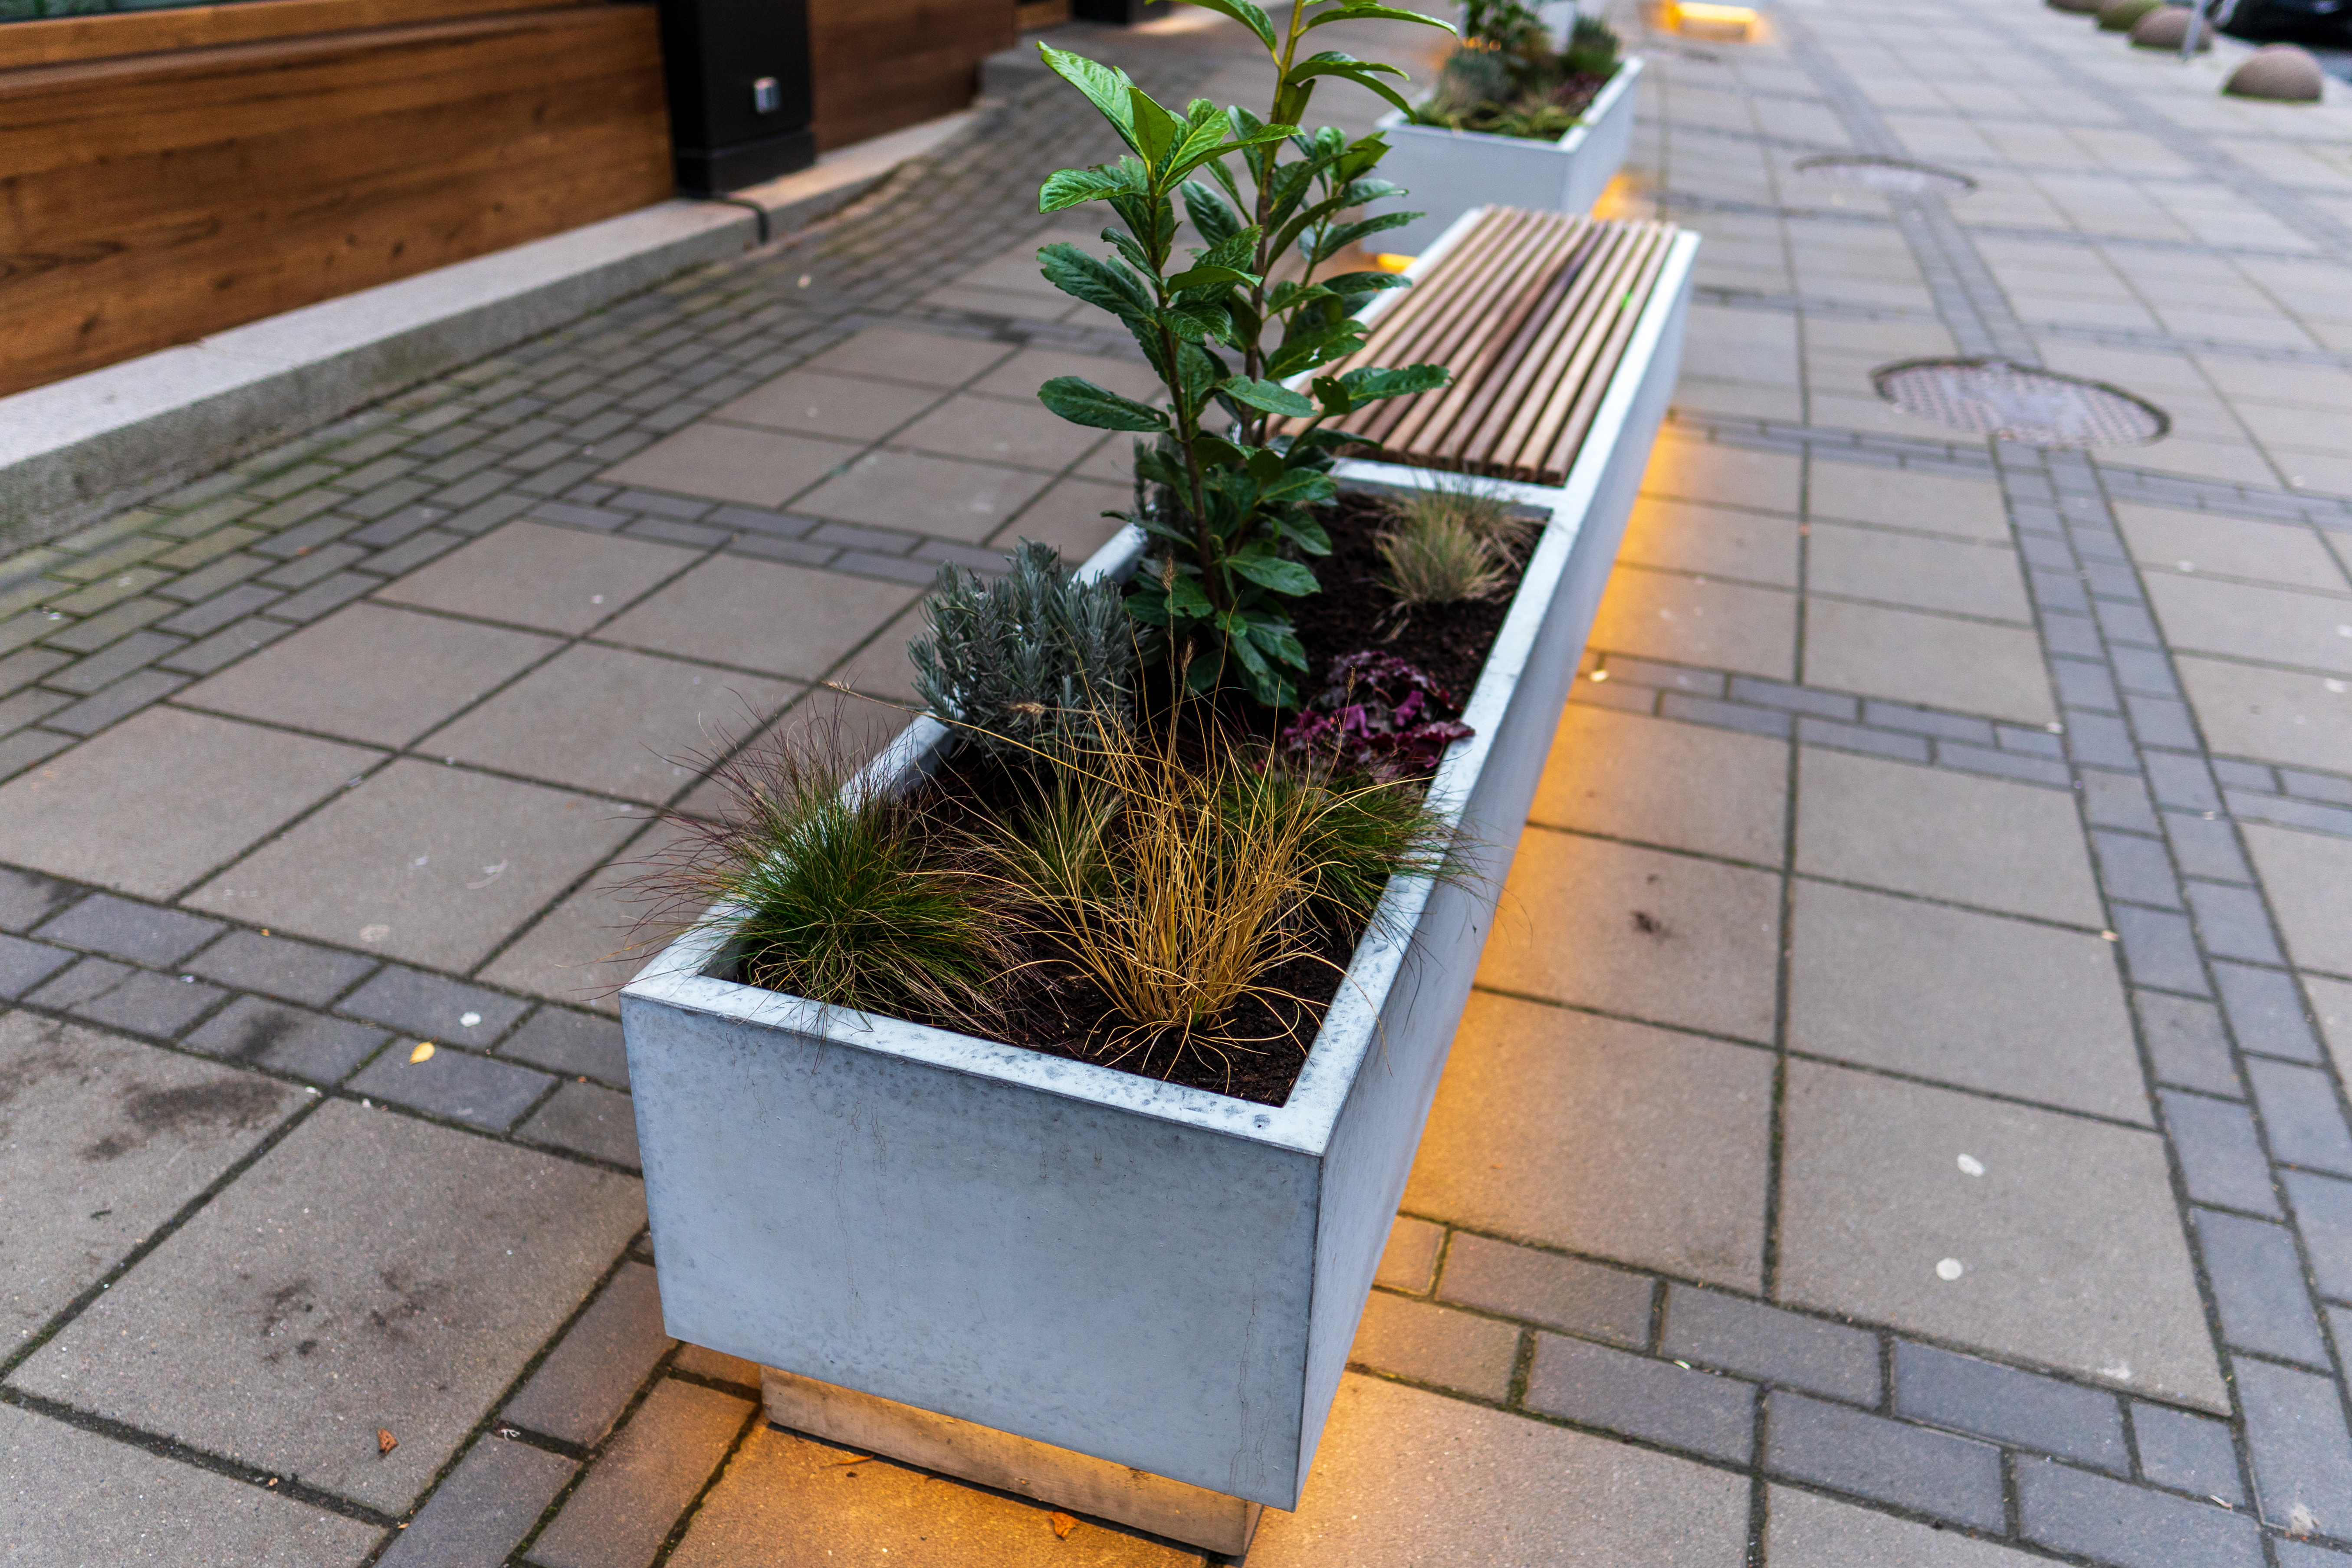
A vibrant, living landscape is often the crowning jewel of a commercial property or luxury residence. Planters do more than just hold soil; they introduce organic texture to stark architectural lines and bring nature into urban environments. However, beneath the lush foliage and colourful blooms lies a complex challenge: water management.
If you treat a planter simply as a box of dirt, you are inviting disaster. Without precise engineering and professional-grade installation, these features can become sources of catastrophic leaks, structural degradation, and invasive root damage. Understanding the mechanics of planter installation is critical.
This guide moves beyond basic gardening tips to explore the structural and waterproofing requirements necessary to ensure your green spaces remain assets, not liabilities.
The Essential "Do's" of Planter Installation
Building a planter that withstands the elements requires a proactive approach. It isn’t just about holding the plants up; it’s about keeping the water out of the building envelope.
1. Do Prioritise Concrete Quality and Surface Preparation
The longevity of a planter starts with its shell.
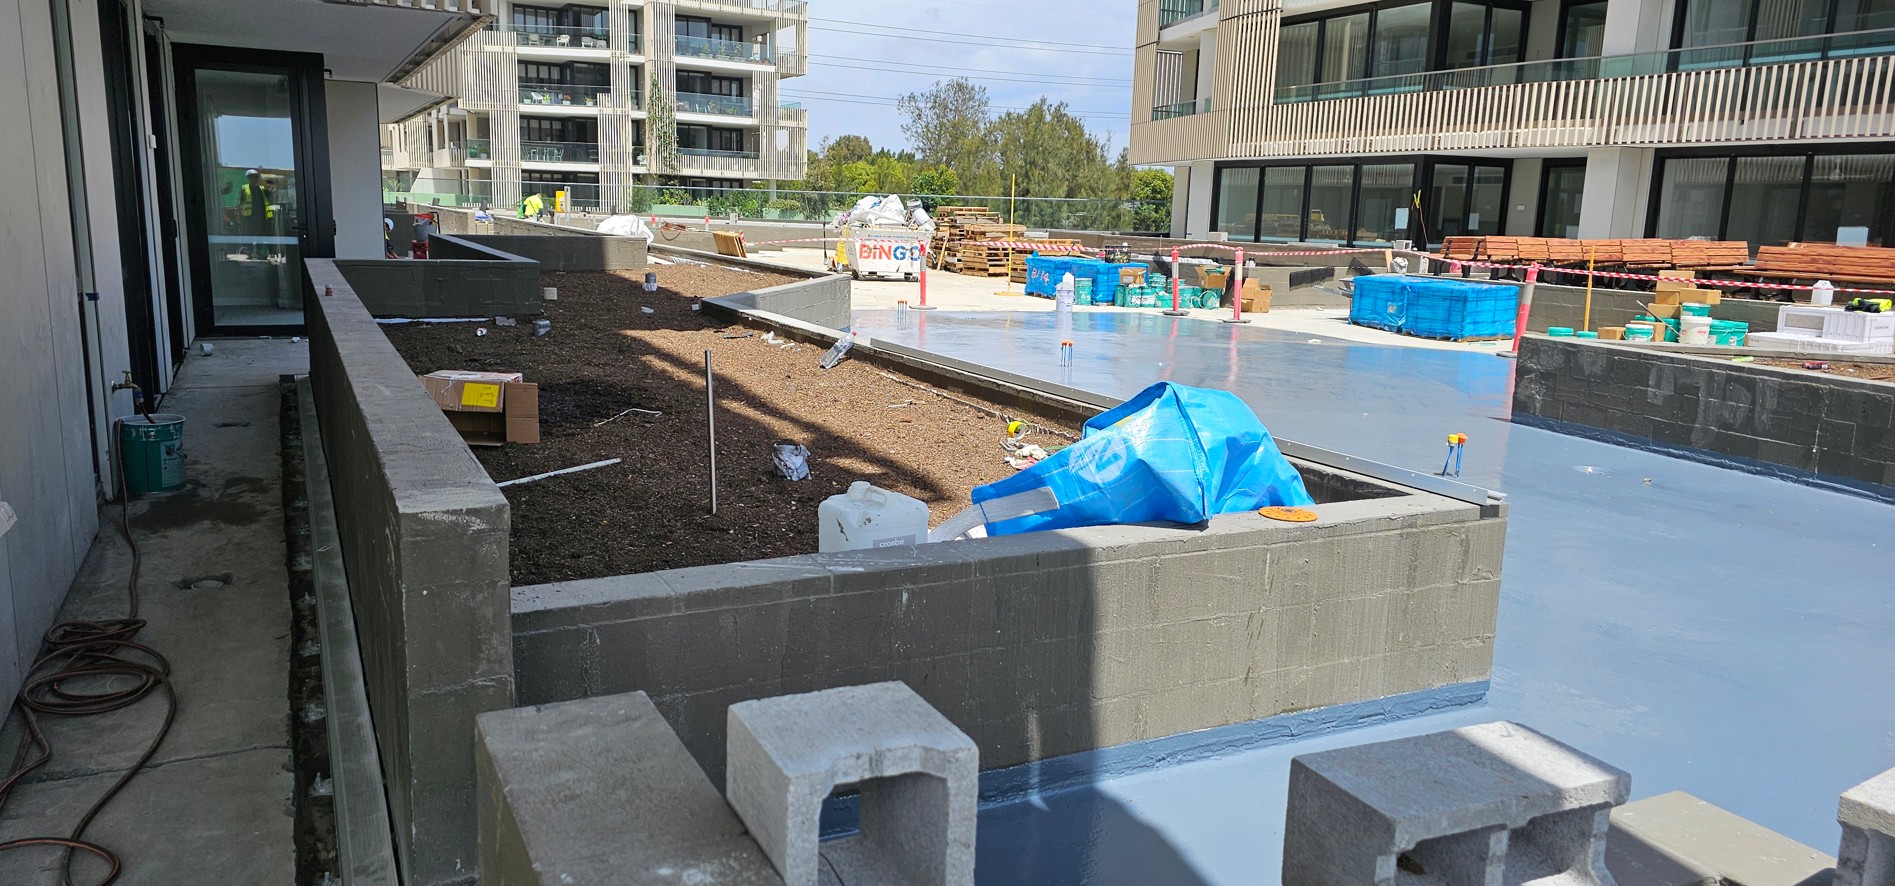
2. Do Implement "Block Trails" on Plaza Decks
When installing planters on elevated decks or plazas, you are essentially building a roof that people walk on.
3. Do Address Defects Before Waterproofing
Applying a membrane over a cracked surface is like painting over rust.
4. Do Select the Right Application Method for the Environment
Not all waterproofing chemicals work in all environments.
5. Do Integrate Root Barriers
Roots are relentless. Over time, they will seek out microscopic weaknesses in concrete and waterproofing.
6. Ensure Local Guidelines Are Followed
It is important to ensure local guidelines are followed. According to Clause F1D4 of the 2022 National Construction Code (NCC), structural joints are not permitted to be located beneath or run through planter boxes. In situations where this requirement cannot be met due to specific site constraints, a performance solution must be developed - this is typically undertaken by an appropriately qualified waterproofing consultant to ensure compliance and long-term integrity.
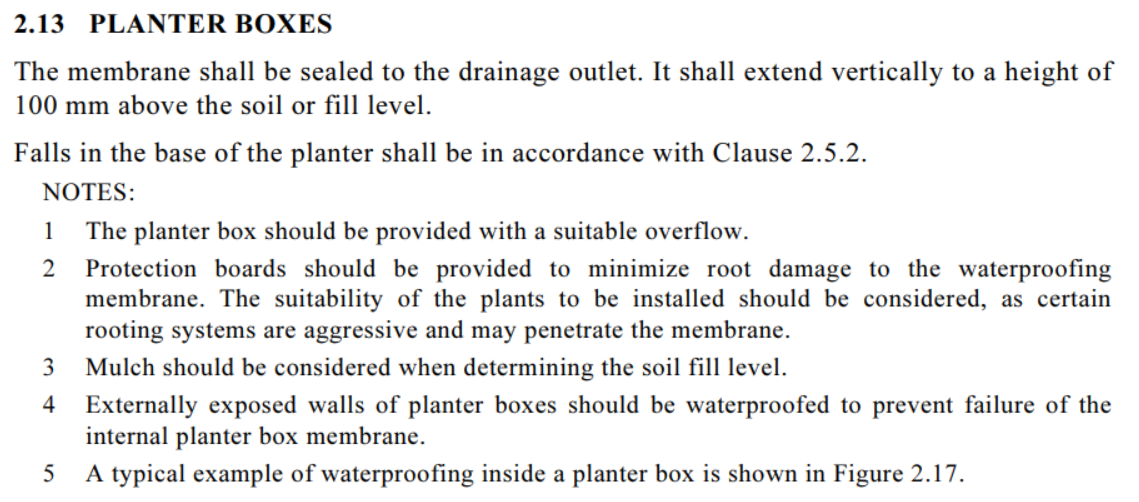
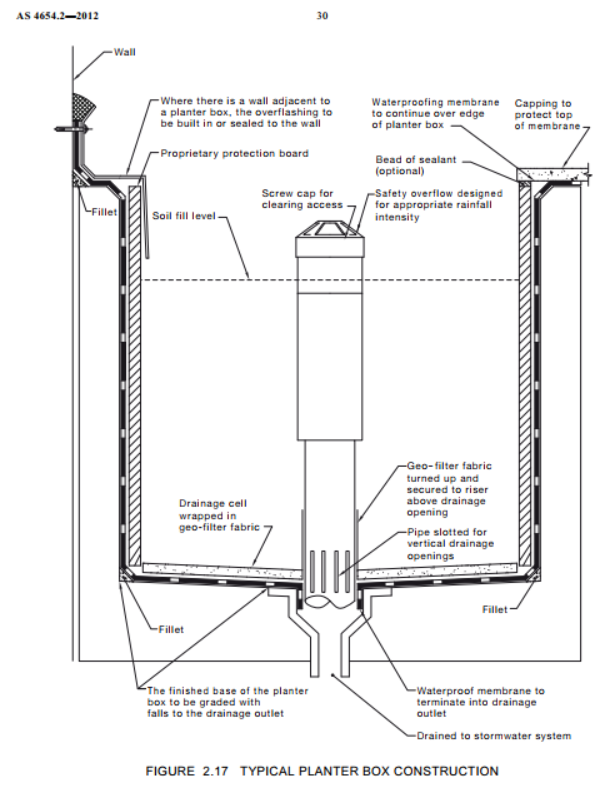
The excerpt below from AS4654.2-2012, Waterproofing for external above-ground use, also outlines important details regarding planter boxes to keep in mind.
The Critical "Don'ts": Mistakes That Cost Money
Avoiding common pitfalls is just as important as following best practices. Neglecting these warnings often leads to expensive retrofits down the road.
1. Don't Ignore Future Growth
It is tempting to plant for immediate gratification, but biology is dynamic.
2. Don't Use Building Walls as Planter Sides
Efficiency should never compromise the building envelope.
3. Don't Skimp on Drainage Hardware
A bathtub without a drain is just a flood waiting to happen.
Choosing Your Materials: A Deeper Dive
Selecting the right materials is the difference between a 5-year lifespan and a 50-year lifespan.
Waterproofing Membranes
Drainage Mats vs. Gravel
While old-school methods rely on heavy gravel for drainage, modern construction favours drainage mats.
Protection Course
Never backfill soil directly against your waterproofing membrane. Sharp stones or gardening tools can puncture it. Always install a semi-rigid "protection course" (often a thin board or heavy mat) as a shield between the membrane and the soil.
The Post-Installation Maintenance Checklist
Even the best-built planter needs care. Hand this checklist to the facility manager or homeowner upon completion.
Installing a planter is a construction project, not just a landscaping task. It requires the convergence of masonry, waterproofing science, and botanical knowledge. By adhering to strict "Do's and Don'ts", focusing on structural independence, seamless waterproofing, and appropriate drainage, you protect the property investment.
Professional-grade installation may require more time and higher upfront costs than a quick cosmetic fix, but the return on investment is a landscape that thrives for decades without threatening the building it adorns. Build it watertight, drain it well, and let nature do the rest.
 Hot Topics
2025 Construction Trends to Watch in Australia
Hot Topics
2025 Construction Trends to Watch in Australia
As we look toward 2025, here are some key trends to watch in Australia’s construction sector...
 Hot Topics
How AI is Impacting Construction in Australia
Hot Topics
How AI is Impacting Construction in Australia
The construction industry across Australia is undergoing rapid change, driven by the adoption of artificial intelligence (AI). Traditionally, construction in Australia....


